

Table of Contents
Your one-stop guide to caravan conversions.
The origins of caravan conversions
Over recent years, a new way of camping has started to take off, converting a van into a motorhome. Van conversions have been around for some time, and many businesses will upgrade your current VW transporter into a very stylish and modern motorhome, such as Redline Campers. However, what’s different about the new wave of van conversions is that people use older, different vans and even buses and convert them themselves, giving these converted motorhomes a unique and wondering spirit feeling and appearance.
Both types of conversions are different and bring their unique aspects to the table. With conversions of new VW transporters, you pay for an otherwise unachievable level of quality, with things such as floor spotlighting, modern power options and management, swivel seats and many new and ingenious ways to offer comfort to users while also being functional, such as taps that can fold away. On the other hand, conversions of older vans and buses tend to do by people interested in DIY and a passion for converting the old van into something new for themselves. As such, the project will have the care, attention, planning, detail and appearance of a project made from passion and the heart, which gives it a unique character.
What’s the advantage of a caravan conversion over a purpose-built caravan?
Purpose-built caravans, such as the ones sold by companies like Venture Caravans, are the traditional image of caravans and can be found regularly at campsites around the UK and abroad. Modern ones are very nicely outfitted, often with many luxuries and fancy commodities, making for a very pleasant stay away in one. However, the one advantage that a caravan conversion has over these caravans is their flexibility in terms of movement. The typical caravan you may think of, such as the ones mentioned above, have to be towed by a car or truck, whereas a caravan conversion is a converted van that retains its ability to move by itself. This is advantageous, as it means that it is considerably easier to move around and travel in the converted caravan, and no towing is required; however, you trade space for this luxury unless you’re converting a bus!
I want to convert an old van, where do I start?
Regardless of if you want to start converting an old van for a hobby, to allow you to get away for weekends or to sell on once you’ve finished, the place to start is budgeting and planning. Depending on how much you’re willing to spend and how you go about converting the van or bus, it is effortless to spend thousands on your project in the blink of an eye! So before you break out the credit card, the best first move you could make would be to sit down and review the situation. There are 5 areas that you need to consider before starting.
- Driving license. To drive your converted van, you will need a C1 and possibly a C1E licence. We cover this in some more detail here, but just for budgeting, an average price to assume you’ll spend on getting this licence is around £700.
- What tools you have to start this job with. If you’re planning to do it all by yourself, you’ll need to have the tools to cut and secure and plan any interior designs you come up with, along with the tools to handle the electrical side of things and other tools such as a tape measure and a spirit level. It will save you time and stress if you check you have all the tools you need before you start, and if you don’t have them get them before starting.
- Unless you have a considerable (>£15,000) of funds to spend on your project, budgeting and sticking to that budget is a critical stage. Once again, we will go into some more detail about it here, but just as an idea, a cheap van conversion is probably around £6,000.
- The DVLA. Once you start converting a van, you need to register it with the DVLA to make sure it is legal. It’s not too complex, but it needs doing before you can take your new conversion on public roads. We discuss it some more here
- How do you intend to use your converted van? Do you intend to live full time as a mini home, or do you only intend to use it at campsites to get away for the weekend? What you intend to use it for affects massively what goes into your conversion, affecting the budget for it. This section covers these aspects in more detail.
Once you’ve sat down and gone through all these aspects, it is also worth planning and designing your conversion before buying your van; that way, you buy a van to fit your design, rather than designing a modification to fit your van. Once you’ve got all of the above sorted, you can start working on your van! There is a step by step guide to doing this in this article, right here!
Getting the licence you need
To drive your converted van, you need a C1 or a C1E license. You can apply for this licence provided you are aged 18+ and hold a full standard driving licence. Before you can get a provisional C1 licence, you need to pass a HGV medical exam. This can be done either privately or through your GP, and costs for this exam range between £50 and £100, depending on who you go with. Once passed, you will be given your provisional licence, and then you can attend a course that includes your theory and practical tests. Websites such as Pure Driving, offer the course that you need to get your license quickly.
It’s also worth noting that the theory and practical tests for the C1 &C1E licenses aren’t too different to the standard driving tests (apart from the C1E test, where you need to demonstrate you can uncouple and reconnect a trailer while following the relevant safety procedures.) The prices and times of these courses vary depending on your confidence, with the cheapest being around £400 for a 1-day course and £1,000 for a 3-day course. Always shop around for different courses to find the best deal near you and a method that suits you too! For budgeting, £700 is a good halfway mark to budget for, as it covers you for the exam and a 2-day course until you decide for certain what course you are doing and how much it’ll cost you.
How do you intend to use your newly converted caravan?
How you intend your newly converted caravan to use dictates massively what goes into the conversion. For example, if you want to live in it full time or at least for large periods, you will need to consider how you’re going to power your caravan, what sort of personal and clothes washing facilities are you going to have. You will also need to consider your ventilation and restroom options and how you’re going to regulate the temperature inside of the caravan. You also need to think about how many people will be living in the caravan and how you’re going to manage storage and sleeping facilities for everyone who intends to live there.
On the other hand, if you only intend to use it for two people for getaway weekends to campsites, you won’t need to worry about things such as washing, restroom and power, as campsites provide all of those, so all you’ll need is a mains hook up. Some other things to consider if you’re planning on using your caravan for extended/full time living in are security, repair kit, first aid kit, curtains, where are bigger items going to be stored safely (if you have them), such as bikes, fridge/freezer facilities, lighting setups, what does everything do and does it have more than one purpose (i.e., sofa bed) and also how comfortable is it to drive? There’s no point in having an awesomely unique converted caravan if it never leaves your garage because you hate driving it!
Registering your new caravan with the DVLA
For your new caravan to be road legal, you need to register the conversion with the DVLA. For the registration to be successful, some criteria split into 2 main areas, exterior and interior, and we will cover both of them below.
Exterior:
- There must be at least 2 windows on one side of the main body (driver and passenger windows do not count)
- There must be a separate door that grants access to the living space (the driver and passenger doors excluded from this)
- Motorcaravan style graphics on both sides of the body
- An awning bar attached to either side of the body
- A high top roof
Interior:
- A bed with a minimal length of 180cm/6ft, which can either fixed or can collapsible (I.e., a sofa bed)
- A water tank
- A fixed table and seats
- A permeant storage facility, such as a cupboard
- Permanent cooking facilities, including a stove.
A few other things to bear in mind are that the DVLA will require photographic evidence of all the criteria to meet. Otherwise, they will not process your application and that any bodywork modifications must not affect the insurance category or any speed limits or legislative requirements.
Full details can be found here
Budgeting for your conversion
Your budget for the conversion is greatly affected by 3 key areas: the age of the van, what work (if any) you intend on contracting out to other people, and what you want in your van. To get an 8/9-year-old van with around 110,000 miles on the clock, you’re probably going to be paying around £6,000. Now you can choose to go cheaper with an older van with more miles on the clock; however, by doing that, you’re trading the initial sale price for the risk of something going wrong later down the line and having to pay more to get it fixed. On the other hand, you could choose to get a newer van, which would cost you more initially, but you run less of a risk of something going wrong. As such, it’s vital to decide early on when budgeting how much you’re willing to spend on your van. Looking on a site such as Autotrader is a great place to start to get an idea for different sorts of vans, their ages and their prices.
Secondly, you need to decide how much of the work you want to contract out to external parties, such as a plumber or electrician. This is a decision that can only really be made by you because you need to take a look at what sort of work will be required, how difficult it will be to undertake and if you think that you can do the work yourself and with the assistance of google or if you need or want to pay an external contractor to come in and do the work for you. If you decide to use an external party for some of the work, ask around and get quotes from different businesses. Asking around on local Facebook groups for people who specialise in the work you require is a great place to start looking for quotes from local workpeople.
The final area you need to consider is how much you are willing and want to spend on the project. Just like any other project or item, you can spend a stupidly large amount of money on things for your conversion. A simple Amazon search for ‘porta potti’ shows results which range in price from £40 up to £400, or a search for ‘solar panels’ shows products that start at £20 and go up to £2,500. The best way to decide how much to spend on necessities and accessories to go in your converted caravan is to shop around and look at what products are available and decide how much you have available to spend on them and how much you are willing to spend.
If you’re trying to make this work on a budget, some other ways to get items for your conversion cheaply is to have a look on second hand/discounted retail sites, such as Gumtree, Facebook marketplace, eBay and Shpock. Often these sites have a ‘free’ section too, so it’s worth checking there too, as there could be items people are giving away that are perfect for you and your conversions, such as an old sofa or cushions or fairy lights. They also allow haggling, which could help you get an even better deal or work to your budget better.
All planned out, now for your first steps!
Now that you’ve planned everything out, you’ve got everything ready, and you’re eager to start your project, your first step is to get your van. Although you may keen to get started, don’t rush this step! After all, this will be the van you work on for the foreseeable future and possibly live in afterwards, too, so you want to get one you are happy with.
If you’re unsure which van style to get, go around and have a look at a few different types to get a feel for them. You may want to test drive a few different types, too, to get a feel for how they handle, especially if you’re planning to travel long distance in one! Use the time that you’re deciding on your van to gather the materials and items you want for your caravan, so when you do get your van, you’re ready to get started right away!
After taking your time in getting the van and gathering all, you need to get started; once you have the van in the area where you’re going to be working on it, such as a driveway, storage unit or garage, nothing is holding you back from staring on your new project! You may want to create a timeline for when you want things completed, especially if you’re bringing in outside help to do parts of the conversion for you, but make sure that you make the timeline reasonable and achievable if you do. It’s better to have a slower timeline where you can spend extra time making sure it’s all correct and carefully put in place, rather than a timeline where it’s rushed and could potentially cause problems in the future.
The process of converting your van
When converting your van, it’s essential to follow a few steps in a particular order, so below, we will be covering those steps and going through the details you need to know to make your new caravan special!
Step 1: Cleaning and Gutting
When you bring your van back to your workspace, the first step is to gut it of all its current contents that you don’t want or need inside of it and clean it all down so you have a clean, clear space to start working on.
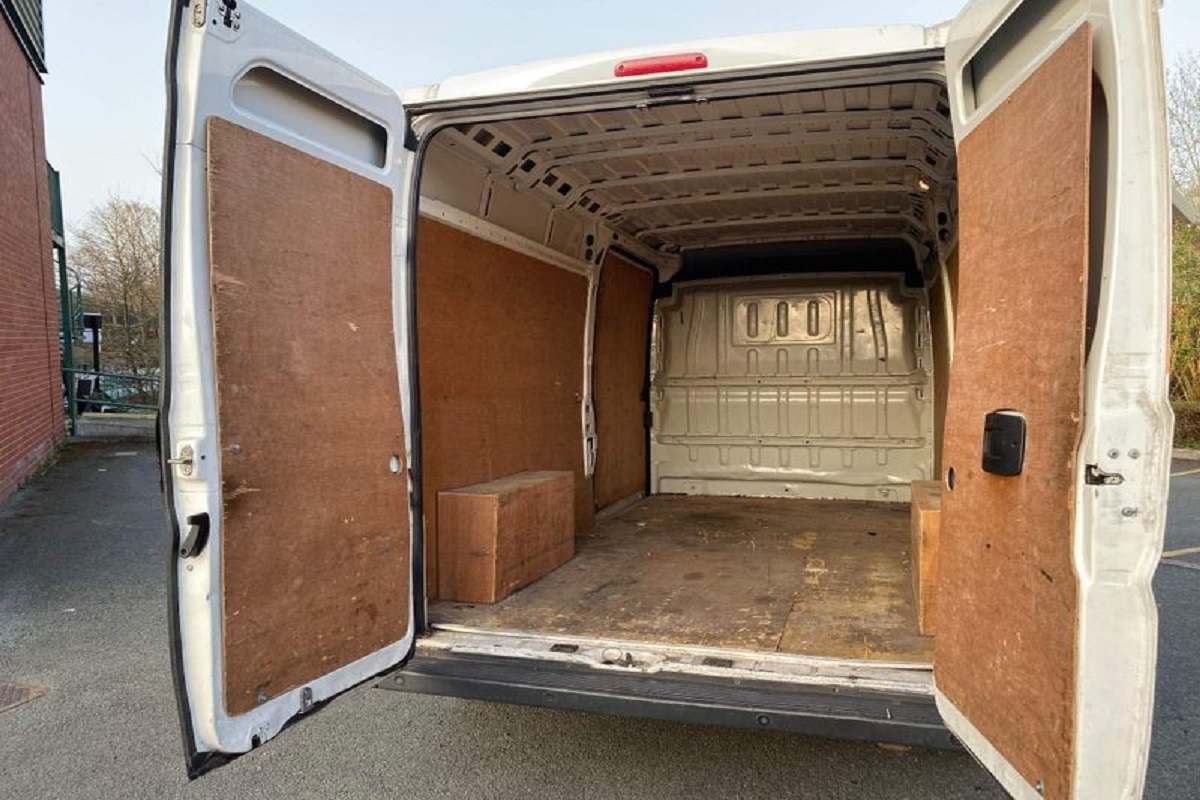
For example, in the photo here, you would want to remove all the plywood boards from the inside of the van to lay insulation and new wooden boards.
Step 2: Final Measurements
Before you start fitting anything, it is a good idea to check your measurements one last time in your van and make sure your design for the conversion fits it and is correct. There’s nothing more infuriating and delaying than fitting something and realising halfway through that it doesn’t fit! Best to avoid that and do one last check.
Step 3: Insulation
This step is optional, depending on where you are and where you’re planning on taking your converted caravan. However, it can get quite cold in the UK at nights, so insulation is a wise move to install. The best place to fit insulation in the walls, floors and roof. Have a look around on the internet for what types people recommend, and for those who want a more eco-friendly kind, websites like insulation shop offer an eco-friendly range.
Step 4: Flooring
As the flooring will be the base of your caravan, this is one of the areas where you shouldn’t cheap out on! Good wood use is plywood, but make sure to buy decent wood from a shop that specialises in hardware, such as Wickes, and if you’re unsure what wood to use, you can always go in-store and discuss it with staff members there!
It is also worth making the design of any wood structures you want to put into your van out of cardboard beforehand; that way, you can test it and cut the wood from the cardboard design so you know it fits. Also, don’t be afraid to go for a fancy design for the floor or walls; after all, this meant to be an enjoyable and lovely place to live in!
Step 5: Building the foundation
After the flooring, it’s time to get the foundations in place! Depending on if you’re living in the van or not while converting, it will affect how you go about this stage. If you live in the van, it’s best to do it area by area, so you still have living space. However, if you aren’t living in the van, it’s easier to do it all in one go. The best part to start on is the bed, and then the kitchen area and finishing it off with the storage areas. Once again, you may want to make the designs out of cardboard first and hold them together with tape to ensure that it fits and so you can cut the wood to the cardboard designs. Ensure that it is at least 180cm in length to pass the DVLA standards when building the bed frame. Make sure to research what thickness and type of wood are best for this, too, as you don’t want to be having to take your caravan apart in the future if something breaks! Another thing to take into consideration when making the foundations is how high the bedframe will be. You may want to make it so that you can sit up on your bed, and so as such, you will need to measure yourself and the bedframe appropriately so that you get the spacing right.
Step 6: The hidden stuff
Now that the foundations built, it’s time to start putting in place the hidden things that make it possible to live in a caravan, such as plumbing and power. It’s essential to get these installed before you start building the interior, as you’ll want these tucked away and out of sight! For water, you may want a water tank and waste tank that can both removed. For power, you may want to wire in solar panels and a battery to charge and power things. Make sure to take every possibility into account and make sure that you built everything you may want to build into the van before you start making the interior.
Step 7: Build the interior
Once the foundations secured, you can start building the interior around them to your specifications and wants. Once again, start with the bed, followed by the kitchen area, and then the storage areas; however, if you have small areas or areas that require things putting into them before they built, such as water tanks and the plumbing in the kitchen, make sure to do that before or while creating the interior. Once again, make sure that the wood you’re using is the right thickness and type, and as always, you may want to make things out of cardboard beforehand, so you know it fits when you cut the wood!
Step 8: Make your own curtains!
As your van starts to look more like a caravan, you may want some privacy, and that’s where homemade curtains come in. Any hobby or craft shop with fabric, so shop around and find a colour and style you like! After you find one you like, all you need to make your curtains is a needle and thread and a special wire that picked up from any hardware store to hang them off; however, make sure to measure them before you start sewing and hanging them!
Step 9: Make it feel homely
So you’ve built everything, and now your van looks like the skeletal outline of a caravan. However, it’s not complete without the little things that make it feel homely. Buy a mattress, linen and sheets for the bed and get a cool box or a fridge for the kitchen area. Then look at getting some nice cutlery and plates, kitchen utensils, a stove and camping chairs and table and lighting options, such as LED strip lights. You may also need a gas bottle or cans. After that, have fun with it! Pin up photos, paint things, put up organisers and racks, get lovely fairy lights, have fun with them and make it your own!
Step 10: Paperwork
No one likes paperwork, but once you’ve completed your caravan, the sooner you fill in the DVLA paperwork, make sure you can drive it and get insurance, the sooner you can go out on your adventure! Ensure that you time the insurance right, so you’re not wasting money on it when you can’t drive it!
Step 11: Adventure!
You’ve done it! You have successfully transformed a van into a homely caravan! All the paperwork done, so the only thing left to do now is to take it on an adventure and enjoy all your hard work! You’ve earned it!